DOCUMENTATION
0. OVERVIEW
2. INSTALLATION
3. ZERROR UI
4. PARAMETERS
5. PRESETS
6. RANDOM PILLS
7. OFFSET PILLS
9. PLAY PILLS
10. LAYOUT MODE
11. LAYOUTS WIDGET
13. MIDI SURFACES
14. MIDI FIGTER TWISTER/SPECTRA
15. GLOBAL SETTINGS
16. TIMELINE
17. UPDATE ZERROR
18. LICENSING
19. CHANGELOG

0. OVERVIEW
Abbreviations:
TD - TouchDesigner
OP - TD's operator
UI - user interface
LMB - left mouse button
RMB - right mouse button
MMB - middle mouse button
[key] - keyboard button

1. SYSTEM REQUIREMENTS
Windows: Win 10+ modern gaming class machine.
Mac: M1 or higer, macOS 10.14+
TouchDesigner Free/Commercial/Pro, minimum build: 2023.12120

2. INSTALLATION
Mac and Windows:
1. Download zerror.tox
2. Drop zerror.tox to TD network editor
3. Open Zerror's viewer: right-click on Zerror COMP -> view..
Notes:
Zerror is designed to interact via container's panel in most cases.
Zerror's panel size could be easly changed and adapted to existing UI. Check UI_Integration_tips__ for more details.
Zerror's container remains privatly locked whenever it is free or pro version.
The free version is limited in the number of parameters and presets you can create.

3. ZERROR UI
Most of operations are performed inside Zerror COMP panel.
In order to get accsess Zerror's panel (as well as any TD's COMP panels): RMB click over OP -> view.. or check UI_Integration_tips__.
Zerror require TD main playbar is playing, TD global cooking is on, Zerror COMP is allowed cooking (all 3 are default for blank projects).
Inside Zerror Panel:
LMB to tweek rotary knobs, switch toggle and momentary buttons.
MMB click on knobs to emulate toggle switch over rotary knobs.
RMB click to open knob properties.
Drag RMB over knobs to move it.
Drag RMB over clean background to select multiple knobs and enter Layout mode. Layout mode changes mouse buttons functions to be more similar to TD network editor's workflow.
[P] to open Zerror Settings or Knob Settings
[W] to open Widgets menu.
[H] to enter Layout mode and zoom viewport to all knobs.
[G] to open utils/beta features.

4. PARAMETERS
Parameter knobs store values.
In most common cases that values are linked to TD's OPs parameters.
CREATE PARAMETERS
Drop any OP's parameter to Zerror viewer.
or
Drop OP's parameter group (e.g Translate (tx, ty, tz)) with CTRL/CMD hold to split parameter group into multiple knobs.
It is possible to drop multiple selected OP's parameters all at once. In that case hold CTRL to split OP's and ALT to traspose direction. Splitting parameters groups also remains on CTRL/CMD holded key.
The created Parameter Knob will be configured according to the operator's parameter, including the value range, type e.t.c.
OP's parameter will be automatically binded to the Knob (by default) or linked via expression (see Global settings)
Current parameter value will be stored across all previously created presets.
PARAMETER TYPES
 Menu Parameter
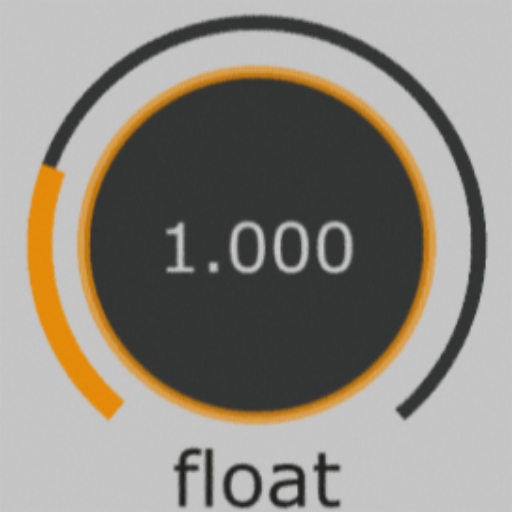 Float/Int Parameter
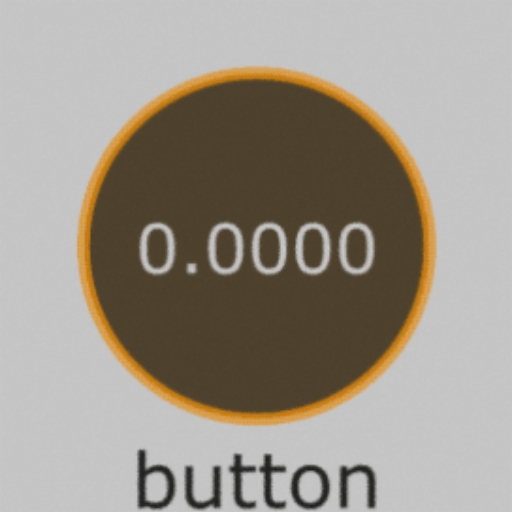 Toogle/Momentary Parameter
CHAGING PARAMETERS VALUES
Use LMB to tweak parameter
or
type exact value with keyboard:
1. LMB click on knob or select multiple parameters with LMB drag over clean background.
2. Type the value
3. [ENTER] or LMB click anywhere
MMB click to switch min/max value or restore default value (depending on MMB action option -> see below).
To change default value: RMB click -> set default value.
RECALL PARAMETERS WITH PRESETS
All new parameters are recallable with presets by default.
In order to turn off Parameter recalling - double click LMB on a knob (or right-click -> 'recall' setting).
The color ring around inner circle indicates whether the parameter is recallable or not.
 Recallable Parameter
 Non recallable Parameter
VALUE RANGES
By default parameter knob ranges are set automatically.
Knob ranges could be changed:
RMB click on knob -> min / max settings
In case parameter value is out of knobs range - knob label will become red:

It does not mean any error or incompatibility.
Knob ranges could be forced clamped: RMB click on knob -> clamp min / clamp max setting
DELETE PARAMETERS:
Right click on Parameter -> Delete
or
Drag RMB over clean backgound to select 1 or more knobs, press [DELETE] keyboard key.
Linked OP's parameter will be automatically unlinked.
PARAMETERS OPTIONS (RMB click on knob):
knob type: change knob type
recall: recall parameter with presets on/off
sensitivity: knob sensitivity, also affects reaction to MIDI encoders events
menu items: for menu parameters only - select menu items with LMB. Drag items with LMB to change order. Shift+LMB to deselect all except clicked one, CTRL+LMB to invvert selection, CTRL+SHIFT+LMB to select all items
min: parameter value at knob fully counterclockwise
max: parameter value at knob fully clockwise
filter: smoothing pararmeter changes, works only with expression linked parameters see Global settings
clamp min/max: clamp parameter value respectively. This covers cases: 1. parameter stored in preset is out of knob range, 2. MIDI encoder events
set default value: set current parameter value as default value
MMB action: choose what happens on MMB click: toggle min/max or restore default value
label: knob label
size: knob size. Knob size also could be adjusted directly in Layout mode
color: knob color. This affects designated colored parts of the knob. In order to change common knobs colors: go to Global settings
show value: display actual parameter value
menu dislay: menu parameters - display menu names or menu labels as knob value
chan: the name of parameter channel. All parameters channels are available at Zerror OP output
show OP: navigate to linked OP inside TD network editor
save to layout: store curent position and size to other layouts. See Layouts widget.
set as default: set current knob settings (like: color, size, knob type, recall, calmp e.t.c) as defaults for new knobs
delete: delete selected knobs

5. PRESETS
Presets store set of all Parameters values for recalling it.
CREATE PRESETS:
Click and drag '+' widget.
 New Preset widget
If you do not see '+' widget - press [W] key and add it to your workspace.
Created Preset keeps all Parameters knobs values. It keeps raw values, regardless Knobs value ranges.
RECALLING PRESETS AND PRESET TYPES:
There are 4 types of recalling presets. Each type has it's visual look. And each Preset Knob could be switched to any of this types (right-click -> knob type):
 Morph Preset
 Toggle Preset
 Momentary Preset
 Classic Preset
- MORPH(aka FLOAT) PRESET
One of the most important feature of Zerror.
Once you hold down left mosuse butoon (LMB) on it - it captures the current state of Parameters knobs.
As soon as you start turning - it starts partially morph captured state towards the actual preset state.
Reaching fully clockwise - the current preset if fully recalled.
You could break and contnue this process anytime by releasing and holding back LMB.
Any action on another knobs returns last Preset Knob indicator to zero, indicating that new arbitrary state of Parameters Knobs will be captured on new recalling of this preset.
Morph Presets also could act as toggle type by clicking with middle mouse button (MMB) on it.
Simplified example:
One paremeter knob PAR1 with 0-1 range and two presets, where P1 recalls PAR1 = 0, and P2 recalls PAR1 = 1:

- TOGGLE PRESET
Acts as A/B switch, where A is arbitrary state and B is stored state.
- MOMENTARY PRESET
Acts same as Toggle Presets without latching B state.
- CLASSIC PRESET
Acts as conventional presets - it recalls parameters states, and that's it.
DELETE PRESET
Right click on Knob -> Delete
or
LMB click on preset knob - press [DELETE] keyboard key.
or
Drag RMB over clean backgound to select 1 or more presets, press [DELETE] keyboard key.
PRESETS OPTIONS (RMB click on knob):
knob type: change preset knob type
sensitivity: knob sensitivity, also affects reaction to MIDI encoders events
recall by color: recall only parameters with specific color (or any color)
recallable only: turn off to ignore "recall" flag of parameter knobs
rand ranges: randomizes the recall ranges for float presets, so that all parameters morph slightly out of sync rather than all at once.
label: knob label
size: knob size. Knob size also could be adjusted directly in Layout mode
color: knob color. This affects designated colored parts of the knob. In order to change common knobs colors: go to Global settings
save preset: override preset with current state
store to presets: appears in Layout mode when presets and parameters selected. This action will store selected parameters values to selected presets
show OP: navigate to linked OP inside TD network editor
save to layout: store curent position and size to other layouts. See Layouts widget.
set as default: set current knob setting as defaults for new knobs
delete: delete selected knobs

6. RANDOM PILLS
Random pills randomize Parameters values.
Create Random pills:
Press [W] to enter Widgets menu.
Drag and drop Random pill.
Usage:
There are two types of random pills:
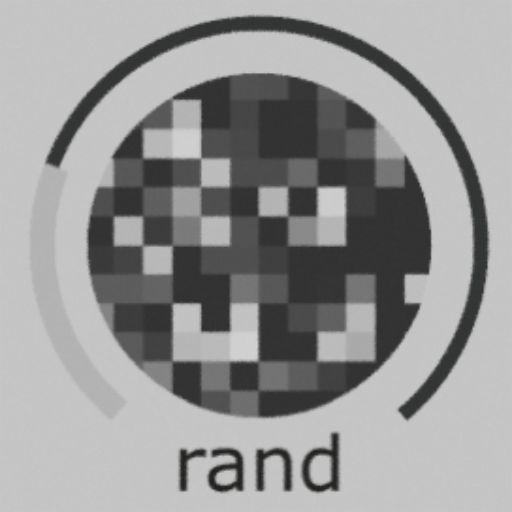 Morph random pill
 Momentary random pill
To change Pill type: RMB on a Pill -> knob type
Morph Random Pill - once you hold down left mouse butoon (LMB) - it captures the current state of Parameters knobs.
As soon as you start turning - it starts partially morph captured state towards random state.
Turning counterclockwise returns Parameters state to the captured on.
Once you reach fully counterclockwise - new random state will be generated for next tweek of the Pill.
Momentary Random Pill - instantly randomize Parameters
Both Morph and Momentarty pills may affect parameters with specific colors and recall states only by choosing corresponding options from right-click menu: rand by color / rand by recall.
RANDOM PILL OPTIONS (RMB click on knob)
knob type: change preset knob type
sensitivity: knob sensitivity, also affects reaction to MIDI encoders events
rand by recall: allows to opererate on recallable/non recallable parameters
rand by color: allows to opererate on parameters with specific color(s)
max rand: maximum randomization (fraction of each parameter knob range)
label: knob label
size: knob size. Knob size also could be adjusted directly in Layout mode
color: knob color. This affects designated colored parts of the knob. In order to change common knobs colors: go to Global settings
save to layout: store curent position and size to other layouts. See Layouts widget.
set as default: set current knob setting as defaults for new knobs
delete: delete selected knobs

7. OFFSET PILLS
Offset pills offset all of specific Parameters values.
May affect parameters with specific colors and recall states by choosing corresponding options from right-click menu: offset by color / offset by recall.
Create Offset pills:
Press [W] to enter Widgets menu.
Drag and drop Offset pill.
 Offset pill
SHIFT PILL OPTIONS (RMB click on knob)
sensitivity: knob sensitivity, also affects reaction to MIDI encoders events
shift by recall: allows to affect recallable/non recallable parameters
rand by color: allows to affect parameters with specific color(s)
label: knob label
size: knob size. Knob size also could be adjusted directly in Layout mode
color: knob color. This affects designated colored parts of the knob. In order to change common knobs colors: go to Global settings
save to layout: store curent position and size to other layouts. See Layouts widget.
set as default: set current knob setting as defaults for new knobs
delete: delete selected knobs

8. RANDOM PILLS PRESET
Random pills presets randomly select preset and recall it.
Create Random pills preset:
Press [W] to enter Widgets menu.
Drag and drop Random pill preset.
Usage:
There are two types of Random Preset Pills:
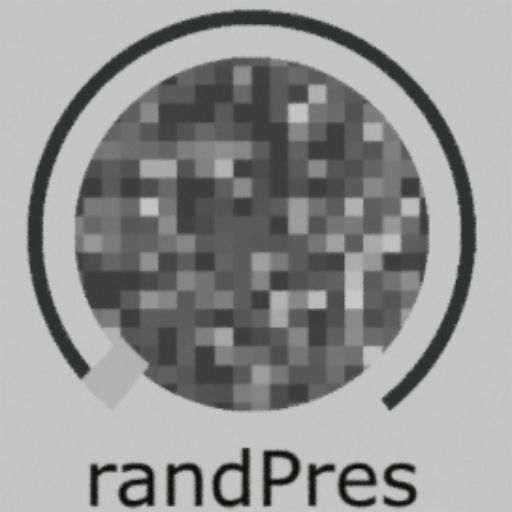 Morph random pill preset
 Momentary random pill preset
To change Pill type: RMB on a Pill -> knob type
Morph Random Pill Preset - once you hold down left mouse butoon (LMB) - it randomly selects Preset Knob.
As soon as you start turning - it starts partially turn selected Preset.
Turning counterclockwise returns selected Preset towards zero.
Once you reach fully counterclockwise - new random Prest will be selected for next tweek of the Pill.
Momentary Random Pill Preset - instantly selects random Preset and recalls it fully.
RANDOM PILL PRESETS OPTIONS (RMB click on knob)
knob type: change preset knob type
rand by color: allows to select and recall presets by color
max rand: maximum recalling value for morph presets
sensitivity: knob sensitivity, also affects reaction to MIDI encoders events
label: knob label
size: knob size. Knob size also could be adjusted directly in Layout mode
color: knob color. This affects designated colored parts of the knob. In order to change common knobs colors: go to Global settings
save to layout: store curent position and size to other layouts. See Layouts widget.
set as default: set current knob setting as defaults for new knobs
delete: delete selected knobs

9. PLAY PILLS
Play pill animates parameters by randomly switching presets.
Play pill is experimental, it's setting and behaviour may slightly change in future updates.
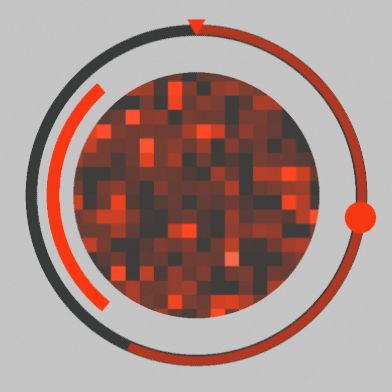
Create Play pills:
Press [W] to enter Widgets menu.
Drag and drop Play pill.
Usage:
Udjust overall speed with LMB on pill.
Each time an orbiting circle pass 12 o'clock - the next random preset will be selected.
Depending on play pill settings selected preset will be recalled with or without fade.
Fade in time is defined by pill setting.
RANDOM PILL OPTIONS (RMB click on knob)
sensitivity: knob sensitivity, also affects reaction to MIDI encoders events
color: knob color. This affects designated colored parts of the knob. In order to change common knobs colors: go to Global settings
rand order: sample presets randomly(1) or sequentially based on it's position(0) or something in between (0-1)
rand by color: allows to sample and recall presets by color
size: knob size. Knob size also could be adjusted directly in Layout mode
period: period time in seconds. Actual period is affected by overall speed adjusted by knob
rand period: randomize period: 0 - no randomize, 1 - actual period is randomly set from 0 to period setting each time orditing circle pass 12 oClock
fade in: fade in time by period fraction
rand fade in: randomize fade in time: 0 - no randomize, 1 - actual fade in is randomly set from 0 to fade in setting each time orditing circle pass 12 oClock
fade curve: fade in curve: linear, easy in, easy out, easy in-out
max value: maximum recalling value for morph presets
rand value: randomize max value recalling value for morph presets
save to layout: store curent position and size to other layouts. See Layouts widget.
set as default: set current knob setting as defaults for new pills
delete: delete selected knobs

10. LAYOUT MODE
Layout mode designed for quick arrange, align and reorder knobs inside Zerror panel.
To enter Layout mode - start dragging over clean backround with RMB preseed. Release RMB.
Alternatively press [L] or [H].
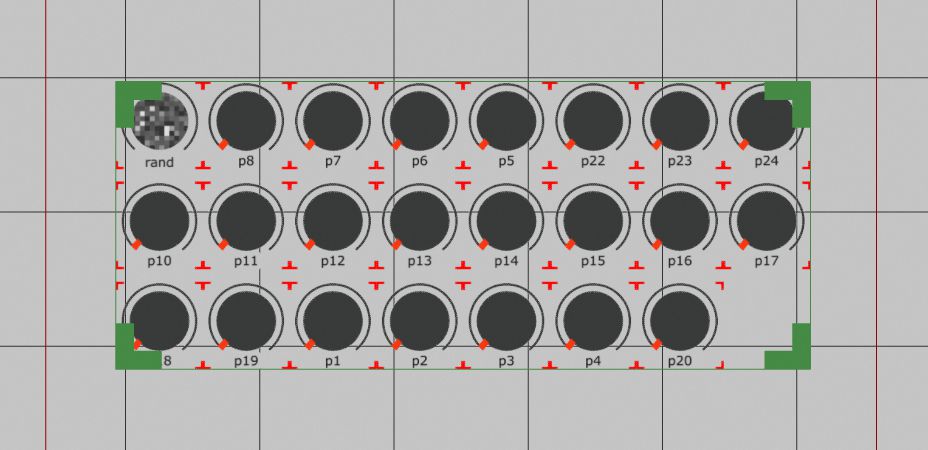
Backround grid will appear. Mouse buttons functions will slightly change - Layout mode acts similar to TD's network editor:
Mouse scroll - zoom in/out
LMB drag over background - to move around
LMB/RMB drag over knob - move knob
LMB click on knob - select knob
LMB click on backgound - exit Layout Mode
RMB click on knob - select knob and open knob's setiings
RMB drag over backround - select multiple knobs
[H] fit viewport to all knobs.
Start dragging RMB over clean background to select multiple knobs.
Arrangement frame will appear.
Dragging arrangement frame corners with LMB or ctrl/alt/shift + LMB allows to quickly arrange multiple knobs in different ways:
- LMB - scale proportionaly
- SHIFT + LMB - scale proportionaly and equalize knob sizes
- ALT/OPTION + LMB - fit to rectangle
- ALT/OPTION + SHIFT + LMB - fit to rectangle and sort by knob type and label
- CTRL + LMB - align to arbitrary grid
- CTRL + SHIFT + LMB - align to arbitrary grid and equalize knob sizes

11. LAYOUTS WIDGET
Layouts widget allows to define and switch between 3 different knobs layouts. Each layout stores all knobs positions and sizes.
We see 3 common use cases:
1. There are too many knobs created and you could place some of them outside visible area in another layout. Like bank switching on midi controllers.
2. While using MIDI surfaces could also perform action like bank switching.
3. Group knobs differently for different tasks.
Create Layouts widget:
Press [W], drag Layouts widget to Zerror workspace.
 Layouts widget
Colored circle dislays current layout: Red, Green or Blue
LMB click to cycle between layouts
Notes
Knobs created in one layout will be placed outside visible area in other layouts. You could find them in other layouts by pressing [H] key.
Selected knobs positions and sizes could be copied to another layout via knob setting -> copy to layout -> click on layout to copy to.
MIDI surfaces and Layouts widget itself are not stored in layouts.

12. CONVENTIONAL MIDI
Zerror supports conventional MIDI mappings with emprovement features.
Howerever we recommend to use MIDI surfaces for flexibillity especially when large amount of midi mapped knobs required.
Press [M] or [P] -> MIDI to enter MIDI mapping mode.
The rest of the process is conventional:
1. Choose MIDI in devices, tick MIDI out if your device supports feedback.
2. Select knob
3. Tweek MIDI controller
and so on 2,3,2,3....
To remove mapping:
Select knob or mapping from list, press [DELETE] button
Zerror automatically recognizes encoder and rotary CC. Encoder type CCs are marked in the midi mapping list with dotted circle.
For the rotary CC there are two modes: direct and pickup. The difference is in the beheavour when MIDI value significantly differs from knob position. Direct/pickup modes are defined per device.
Zerror automatically manages TD midi mapping dialog. Howevere you are welcome to manually make changes there without issues.

13. MIDI SURFACES
MIDI control surfaces designed to significantly enhance and speed up traditional MIDI mappings.
MIDI control surfaces supports: rotary (both endless and single turn) and encoder knobs notes on/off. It could send MIDI messages back to controller.

The idea behind MIDI Surfaces is to quickly "reproduce" your MIDI controller and its layout inside Zerror and simply drag knobs into it.
The benefits:
- clear visual representation of mappend knobs
- reduced number of mouse clicks required to map each knob
- mapping multiple knobs simultaniously
- no need to remember which knob is mapped to particular controller knob/button
- infinite number of virtual banks even with MIDI controllers that do not have it
Create MIDI surface:
Press [W], drag MIDI Surface widget to Zerror workspace.
For the first time created MIDI Surface requires to be configured accordingly to MIDI controller:
1. RMB click on MIDI Surface label at top left corner of the surface
2. Device -> select you MIDI device
3. Define rows and cols accordigly your controller or as you wish.
4. Click configure - Configure dialog will pop up.

5. Assign sequentially nessasary slots: LMB click on slot -> tweek rotary/button, and so on. In order to simplify the procees: tweek rotary more after assignment to switch to the next slot automatically. Also use keyboard up/down arrow keys if neccessary. It is also not nessasary to assign all slots.
6. Close Configure dialog.
Now your MIDI Surface is ready.
Drag and drop Zerror's knobs into surface with RMB or use Layout mode -> assigned knobs will stick to surface slots. Also in case the slot has a midi assignment - small circle will appear at right top of the dropped knob.
It is possible to assign one knob per slot.
Virtual banks
To add virtual banks:
RMB click on MIDI Surface label at top left corner of the configured surface -> clone surface
Place new surface in appropriate location.
To switch between banks - LMB click on MIDI Surface label or color circle at top right. Active bank become colored, inactive - monochromatic.
It is also possible to define a specific controller's knob/button for switching banks by mapping bank slot in configure dialog.
NOTES:
It is a good practice to save configuration files for your MIDI controllers - RMB on MIDI Surface label -> save config.
Next time - to create new MIDI Surface for this device: RMB on MIDI Surface label -> load config
You should define MIDI out and cc pickup accordingly to your controller's knobs beheavour.
In most common cases:
- Endless encoder without indication: MIDI out off, cc pickup off
- Endless encoder with indication: MIDI out on, cc pickup off
- Endless rotary with feedback support or indication (e.g AKAI mpd218): MIDI out on, cc pickup off
- Single turn knobs (e.g. Korg NanoCTRL): MIDI out off, cc pickup off or on
If you need blank parameters mapped at each MIDI surface's slot: RMB on MIDI Surface label -> fill empty slots.
This is useful when Zerror is used to control device via MIDI.
As an example - any standalone music Synthesizer which supports MIDI control could be easly extended with Zerror's presets and randomizers functiononality via MIDI Surfaces.
MIDI SURFACE OPTIONS (RMB click on Midi Surface label)
sensitivity: sensitivity for encoder messages
label: Surface label
size: Surface size
color: Surface color. In order to change common colors: go to Global settings
device: MIDI in device. Devices starts with number - are devices alredy assigned in TD MIDI Dialog and the number is ID. Selecting device without ID number - automatically creates new ID in TD dialog and assigns devices
on: tur on/off MIDI Surface
MIDI out: send MIDI messages back to device on/off
cc pickup: rotary knobs messages beheavour when incoming MIDI value significantly differs from knob value
rows and cols: define the shape of the surface
configure: open Configure dialog
create presets: create new preset at the empty slot on incomig MIDI vlaue = 127 (like press a button or fully clockwise rotary)
create pars: create and link new parameter at the empty slot on incomig MIDI vlaue = 127 (like press a button or fully clockwise rotary) and mouse cursor is over TD OPs parameter
fill empty slots: create blank parameter knobs at each empty MIDI-mapped midi slot
clone surface: duplicate selected MIDI Surface
load config: load MIDI Surface configuration from file
save config: save MIDI Surface configuration to file
set as default: save settings as defaults for new MIDI Surfaces
delete: delete selected MIDI Surface

14. MIDI FIGTER TWISTER/SPECTRA
Zerror natively supports MIDI Fighters (MF) Twister (MFT) and Spectra (MFS) .
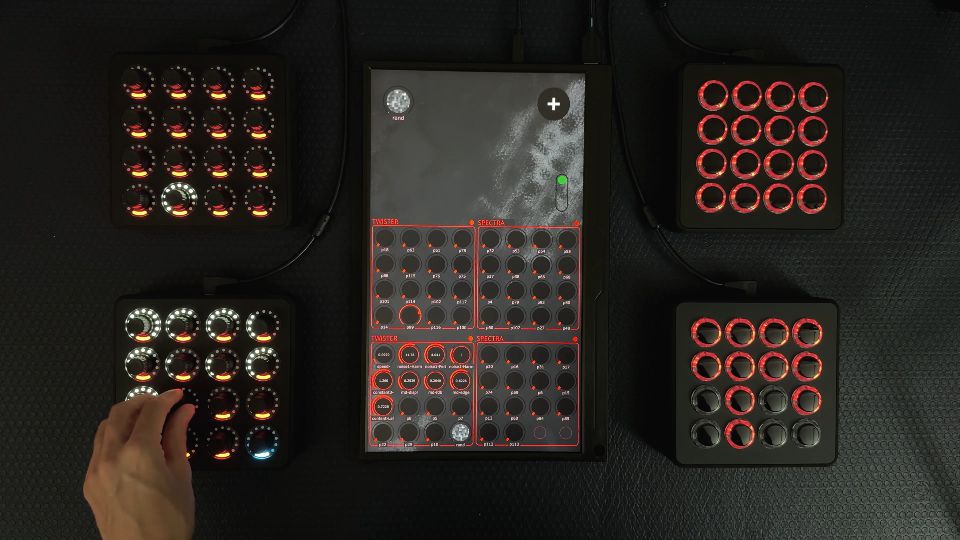
Key features: Convinient control surface ,2-way MIDI connection, Infinite banks number, Multiple device support, Automatic configure device, 2-way color following, automatic device assign, special functions
Hardware setup:
Close all apps that uses MF. Connect you MF before start TD. You are able to connect simultaniously as much MF as you have.
Create MF Control Surface:
Press [W] to enter widgtes menu.
Drag and drop MIDI Figter Twister/Spectra
Created Surface widget will be assigned to MF automatically. It appears colored in case of success.
For the first time of usage MF with Zerror - MIDI addresses needs to be configured: RMB on a text label at top left of the control surface -> configure.
Note: this will override current MF hardware configuration. It does not affect device firmware. Default config could be restored via original MF utility.
Assign knobs:
Drag desired knobs with RMB into MF surface. Assigned knobs will stick to corresponting locations and MF encoders/buttons will light up with correcponding colors.
For multiple knobs assigmen Layout mode is more convinient.
Actions on empty slots:
Push MFT encoder or press MFS button to create new preset
In case mouse cursor is located over OP parameter - this action creates and link new parameter
Vitual banks
Zerror bypasses MF internal banks and utilize it's own virtual banking system.
To add bank - just add more MF surface.
To switch between banks - press rights side MF buttons 1 or 3. Alternatively - LMB click on MF surface label or color circle at top right. Active bank become colored, inactive - monochromatic.
In case of using multiple MF simultaniously - you could define which MF surface belongs to particular MF device:
RMB on MF surface label at top left -> change device property.
Side buttons
Both MFT and MFS has side buttons with special Zerror's functions:
Left side
Left side buttons performs actions on latest tweeked by MF knob
Button 1: toogle recall on-off parameter/ override preset. To confirm action - push correspondig MFT encoder/ MFS button. Or any other encoder/button to cancel.
Button 2: change knob color
Button 3: delete knob. To confirm action - push correspondig MFT encoder/ MFS button. Or any other encoder/button to cancel.
Right side
Button 1: switch to next control surface (aka next bank)
Button 2: cycle layouts, see Layouts widget for more info
Button 3: switch to previous control surface (aka previous bank)
MIDI Fighters settings menu (RMB click on label at left top corner)
sensitivity: sensitivity for encoder messages
label: Surface label
size: Surface size
color: Surface color. In order to change common colors: go to Global settings
device: MIDI in device. Devices starts with number - are devices alredy assigned in TD MIDI Dialog and the number is ID. Selecting device without ID number - automatically creates new ID in TD dialog and assigns devices
on: tur on/off MIDI Surface
configure: automatically loads controller settings.
create presets: create new preset at the empty slot (push encoder on TWISTER or press button on SPECTRA)
create pars: create and link new parameter at the empty slot (push encoder on TWISTER or press button on SPECTRA) while mouse cursor is over TD OPs parameter
fill empty slots: create blank parameter knobs at each empty slot
set as default: save settings as defaults for new MIDI FIGHTER surface
delete: delete selected MIDI FIGHTER surface

15. GLOBAL SETTINGS
Press [P] to enter Zerror Global Settings
Global Settings:
WIDGETS: open Widgets dialog
MIDI: open Conventional MIDI dialog
bg color: Zerror viewport backgound color
text color: knob labels color
value color: parameters value color
knob color: knobs base color
active color: knobs inner circle color on mouse down
color palette: change default colors for tagging knobs
day/night: switch between color themes: each color setting above is stored for particular theme
bg TOP: TOP to use as backgound image
bg opacity: bg TOP opacity
bind type: default linking parameters type: bind or expression
global sensitivity: global knobs sensitivity
multi tweak: turn on/off multiple knobs selections and tweaking
split chans: splits Zerror output CHOP while expression linking type is used. This option reduces unnessasary cooks at most circumstances.
OP colors: automatically change OP color when linking parameters, and changing its color tag
menu size: Zerror dialogs size
check updates: check for online updates

16. TIMELINE
Timeline-Light is a free and lightweight timeline component for Zerror presets arrangement.
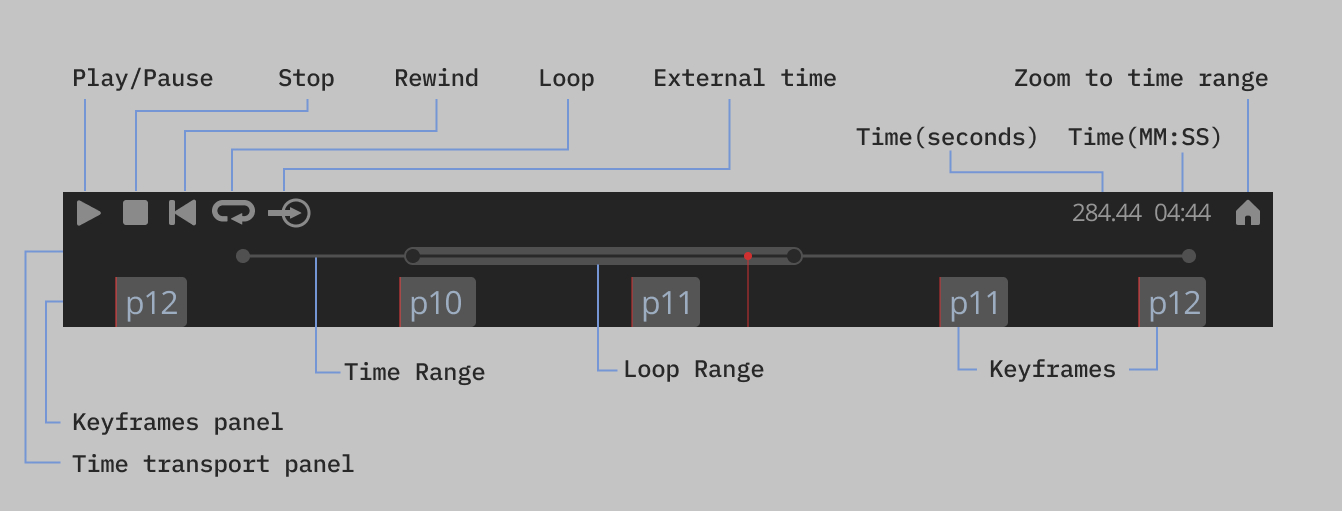
USAGE:
INITIALIZE:
1. Drop timelineZerrorLight.tox to network editor.
2. Drop Zerror COMP into Timeline viewer or assign Zerror COMP to timeline's Zerrorcomp parameter.
KEYFRAMES:
1. Create presets keyframes with RMB click on keyframe panel
2. Select keyframe with LMB click
3. Select multiple keyframes with CTRL/SHIFT + LMB or LMB drag over keyframe panel
4. RMB on selected keyframes to change presets or transition types
5. Adjust keyframes time by dragging with LMB
6. Stretch keyframes' times by dragging with [SHIFT]+LMB
It is possible to copy [CTRL+C] selected presets from Zerror Layout mode and paste [CTRL+V] in timeline.
TIME CONTROL:
1. Drag time with LMB over Time transport panel
2. Adgust start/end time by dragging time range circles.
3. Click LOOP button to activate loop mode.
3. Adjust loop start/end by dragging loop range circles.
4. Click PlAY/STOP/REWIND
5. To use external time control - assign CHOP with time channel (in seconds) to External time CHOP parameter, click External time button.
TIME NAVIGATION:
1. Click HOME button to Zoom to full time range.
2. Mouse scroll to zoom in/out time
3. Drag with RMB over Time transport panel to move visible time range.
SYNC AUDIO/VIDEO:
Drag and drop AUDIO/MOVIE OPs to timeline to automatically assign Timeline's time to file playback and adjust time ranges accordingly.
Or manually - use Timeline's output as a source for index parameter for AUDIO/MOVIE OPs, switch OPs Play Mode parameter to "Specify Index".

17. UPDATE ZERROR
For the new TD projects - simply download and use the latest Zerror.
To update zerror in existed project:
1. Press [P] to open Zerror Settings
2. Click 'Check updates' at the bottom -> confirm if updates are available
Or
1. Drop new clean Zerror.tox to network edit
2. Drop old Zerror COMP to new Zerror UpdateZerror parameter.

18. LICENSING
Purchase Zerror Pro:
1. From Zerror panel - press [P]->Licence manager at bottom, follow purchase link.
2. After checkout you will get an email with your License Code, keep it in secure place.
Activate:
Internet connection required
1. From Zerror panel - press [P]->Licence manager at bottom.
2. Paste your License Code
3. Click ACTIVATE
Transfer License to another machine:
Internet connection required
1. From Zerror panel - press [P]->Licence manager at bottom.
2. Select installed key -> DEACTIVATE
3. Now you could activate your License Code on another machine.
Compatibility:
Since Zerror version 5.19 - licences are portable and got a new (v2) format
Newer Zerror versions are compatible with older (v1) licenses
Older Zerror versions are not compatible with v2 licenses.
v1 licences are also transferable via newer Zerrors' License Manager, but older Zerror's will not work with v1 license after transfer.
To simplify all above:
In case the license was purchased after June 13 2024 - be sure to use Zerror v5.19+
In case the license was purchased before June 13 2024 - be sure to use Zerror v5.19+ after transfer it to new machine.
Zerror Demo limitations:
Demo version is limited with a number of parameters (5) and presets(5) you could create.
In order to benchmark larger number of knobs you could download sample projects.
Sample projects also represent limitations of projects created with Pro and opened on machines without Pro.
Purchasing Pro license doesn't interrupt current process of using Zerror - no new dowload required, no adittional actions on existed projects required.
Important about Zerror licensing:
Single Zerror Pro licence key is valid for single machine.
Single Zerror Pro licence key is valid for all new Zerrror versions during 1 year.
Zerror Pro license is transferrable since Zerror version 5.19
Zerror Pro license will not remove privacy from Zerror COMP.
Zerror Pro is required for creating new parameters and presets
Zerror Pro is not required for creating new widget
Zerror Pro is not required for tweek knobs, or control parameters and presets
In other words: once you ve done TD project with Zerror Pro - you could open and control it on other machines without need to purcase extra license. But creating extra parameters and presets might be limited.

19. CHANGELOG
February 08, 2025
TD build: 2023.12120
sorting improvements
MMB action on multiple parameters
select and tweak multiple parameter knobs
February 03, 2025
TD build: 2023.12120
bugfix: midiSurface noteOn/Off events not working
New widget: shift pill
bugfixes
Externaldata and Refreshdata parameters.
January 26, 2025
TD build: 2023.12120
Utils: drop page improvements
New Utility: Convert Bindings To Expressions
January 23, 2025
TD build: 2023.12120
bugfix: presets recalling few cases
January 23, 2025
TD build: 2023.12120
bugfix
January 23, 2025
TD build: 2023.12120
Bugfix: Midi Surface midi cc not full knob range handle
January 18, 2025
TD build: 2023.12120
Bugfix: 'fill empty slots' not working for Midi Fighters
January 13, 2025
TD build: 2023.12120
Bugfix: on update
January 13, 2025
TD build: 2023.12120
Midi Surface: bugfix when knob was mapped as encoder, but actually is not
Presets: rand ranges option randomizes the recall ranges for float presets, so that all parameters morph slightly out of sync rather than all at once.
January 10, 2025
TD build: 2023.12120
Presets parameters page: improvements
January 10, 2025
TD build: 2023.12120
Presets parameters page: improvements
January 10, 2025
TD build: 2023.12120
Presets parameters page: improvements
January 08, 2025
TD build: 2023.12120
bug fix: rand pill 'rand by recall' didn't work
January 07, 2025
TD build: 2023.12120
January 07, 2025
TD build: 2023.12120
Performance optimizations
Recall presets from Zerror parameters page
Midi Surface: performance ptimizations and bug fixes
Midi Fighter Twister: performance ptimizations
More natural behavour of parameters with inverted ranges
UI/UX improvements and fixes
December 23, 2024
TD build: 2023.12000
bugfix - on drop menu parameters
bugfix: Conventional midi new device assignment
New 'Classic' preset type - it acts as classic presets buttons on most of classic gear or most of software with presets. It only recalls preset without ability to return to previous state (unlike toggle/momentary preset types).
MIDI - better handling note on/off events: Note On with velocity 0 - performs with momentary Knobs only
December 19, 2024
TD build: 2023.12000
Momentary and toggle parameters act as buttons on incoming MIDI note on/off events, regardless of their 'MMB action' option.
December 19, 2024
TD build: 2023.12000
glslTop uniform parameters bugfix
December 19, 2024
TD build: 2023.12000
Labeling improvements
December 19, 2024
TD build: 2023.12000
Parameters knobs: 'set default value' option - set current value as default value to recall with MMB (in case MMB action is set to recall default value)
hold CTRL/CMD to split parameter group while dropping OP's parameters
December 16, 2024
TD build: 2023.12000
bugfix: potential fail to update zerror in very rare cases
December 16, 2024
TD build: 2023.12000
Zerror Settings button added to Right-click menu at top right corner.
Update menu knob labels if changed (which is convinient for custom menu parameters). Since there is no efficient way to monitor menu parameters items changes - zerror updates them while creating new presets or manually via zerror parameters: external -> Update menu labels pulse
Keyboard input improvements
Keyboard input improvements
Presets: 'recall by color' option - recall any (all) color parameters/ same as preset color/ not the same color
Presets: 'recallable only' option - uncheck to ignore parameters' 'recall' flag.
December 13, 2024
TD build: 2023.12000
Automatically labeling GLSL and GLSLmulti TOP's uniform parameters accordingly it's name
'Add preset' pulse parameter - create presets from outside Zerror UI
December 03, 2024
TD build: 2023.12000
default settings
bugfix: conventional midi - on delete mapping
MIDI FIGHTERS option: fill empty slots with blank parameters knobs.
Midi Fighters: optional turn on/off create parameter knobs and presets on empty slots
Midi Fighters: banks switch sorted by: (labels, y, x)
Midi Fighters: reduce midi device IDs usage
MidiSurfaces: core optimizations
MidiSurfaces: empty slots incoming midi indication
Midi Note On (as well as Midi Fighter Twister push encoder) - mimics knob's MMB action: min-max/default value
November 28, 2024
TD build: 2023.12000
bugfix: proper handle constantCHOPs' parameters' names
optional actions on MMB click: min-max or default value
November 28, 2024
TD build: 2023.12000
New Parameter: external -> next layout
October 16, 2024
TD build: 2023.12000
touchscreen support
October 16, 2024
TD build: 2023.12000
bugfix: on layouts switch
October 15, 2024
TD build: 2023.12000
bugfix: on project fps change
June 30, 2024
TD build: 2023.11760
parameters: it is possible to swap ranges to inverse the knob behavour
bugfix: create pulse parameters causes errors
June 14, 2024
TD build: 2023.11760
improvements
June 14, 2024
TD build: 2023.11760
June 12, 2024
TD build: 2023.11760
Bugfix: menu parameters with 'recall off' still recalling
Portable Licenses
May 24, 2024
TD build: 2023.11760
fix: on delete current preset by [DEL]
ctrl+c - copy presets for timeline
preset mixer for external timeline
May 17, 2024
TD build: 2023.11760
Play pill: rand order setting - sample presets randomly(1) or sequentially based on their positions(0) or something in between (0-1)
May 15, 2024
TD build: 2023.11760
global settings: bg opacity setting affects Zerror OP panel opacity now
preset recalling core optimization
May 08, 2024
TD build: 2023.11600
OG label0 removed
May 07, 2024
TD build: 2023.11600
presets recall momentary pararameters now
G key : copy pars from selected ops -> copy OP parameters values to knobs if matches
play pill: rand by color setting
Random pills: max rand setting
Random pill: on midi notes behavour
Random pill: rand by color setting - randomize parameters with all colors (all), same as pill's color (same), not the same as pill's color (not same)
Random pill: rand by recall setting - randomize both recallable and non-recallable parameter (all), recallable only (recall), non-recallable only(not recall)
Random Pill Preset: rand by color setting- select presets by color: all colors, same as pill colors, not the same as pill colors
Midi Surface: notes out setting - enable/disable sending notes to midi device,
Midi Surface: ignore velocity setting - ignore notes velocities and override with 'velocity' setting value
Midi Surface: rand velocity setting - randomize velocity (0 - no randomize, 1 - max randomize)
G key->GEN RAND PRESETS: bugfix
online update: minor bugfix
MIDI Fighter Spectra: bugfix
April 04, 2024
TD build: 2023.11600
beta feature: play pill - random animation widget
bugfix: random preset generator dublicates presets
bugfix: wrong TDbuild version check on Update
bugfix: on new preset UI behavour in few cases
March 31, 2024
TD build: 2023.11600
fixed: MIDI and MIDI surfaces - Intech Studio devices not recognized properly
fixed: MIDI settings lost on update
fixed: MIDI Surfaces broken on update
March 29, 2024
TD build: 2023.11600
on update - copy menu labels.
MIDI surface with TD NonCommercial bugfix
all knobs: no label -> no label background.
Menu parameters: 'menu display' setting allow to choose what to show as value: menu names or menu labels
March 20, 2024
TD build: 2023.11600
FIRST PUBLIC RELEASE